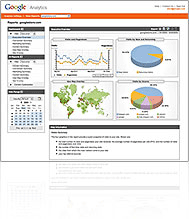
 There seems to be so much confusion with understanding Google Analytics that I thought it would be appropriate to devote a special series to it.
Once I uncover the mystery surrounding its power, you’ll forever wonder how you lived without it.
Throughout the series, I’ll reveal the proper way to install Google Analytics and explain what it can tell you once it has been successfully completed.
I’ll also uncover the mystery surrounding its 4 main components including:
- “Vanilla” Google Analytics Tracking
- E-Commerce Tracking
- Conversion Tracking
- Goal Tracking (including Sales Funnels)
Together they all play an important part in the entire “statistics overview”, yet each one can operate independently of the other. As such, each one also has their own unique and separate tracking code that needs to be installed if you plan to use it. Simply installing “Google Analytics” will not install E-commerce Tracking, nor will it install Conversion Tracking or Goal Tracking. These are separate entities within the entire analytics package.
Ok, so now that I have pointed that out, let me explain the difference between the 4 main components.
“Vanilla” Google Analytics Tracking
The “typical form” of a Google Analytics install is what I like to call the “Vanilla” (or “plain”) version. It is the one that you are given tracking code for by default when you create a Google Analytics account.
“Vanilla” Google Analytics Tracking is used to track typical patterns you would expect to see with most “statistical tracking packages”. You’ll get things like “where your visitors are coming from”, “what type of browsers they are using”, “how many visitors came to your site”, etc…
The code you use to install Google Analytics looks something like this and is usually placed near the bottom of every page you want to track information for. It’s the tracking code that starts with “UA-” at the beginning.
Sample of “Vanilla” Google Analytics Tracking Code:
E-Commerce Tracking
Google Analytics E-Commerce Tracking is used to track product sales, sales revenues, transaction data, etc… When you install E-Commerce tracking, you’ll get reporting figures for things like “dollar amount of total sales for the period”, “product sales revenues for the period”, “top selling products”, and more.
The code you use to install Google E-Commerce Tracking looks something like this and MUST be placed BELOW the “Vanilla” Analytic Tracking code (shown above) on the sales RECEIPT page. This is the page a user arrives at after completing a successful sale at your store.
Sample of Google E-Commerce Tracking Code:
Google Conversion Tracking
If you are running any Paid Search (PPC) campaigns (especially through Google Adwords), then you will want to install Conversion Tracking to determine how effective those campaigns are at increasing conversion, and generating sales.
Conversion Tracking reports things such as “How effective your Adwords ads are”, “which actual keywords convert to sales, and which just cost you money”, “overall conversion rate for a campaign, ad, or group of keywords”, and more.
The code you use to install Google Conversion Tracking looks something like this and is placed on the sales RECEIPT/CONFIRMATION page. This is the page a user arrives at after completing a successful sale (checkout) at your store.
Sample of Google Conversion Tracking Code:
Google Analytics Goal Tracking
Goal Tracking gives you the ability to track important events (actions/goals) that users take when they visit your site.
These Goals can range from simply filling out a contact form, to downloading a free brochure, to an actual sale that generates revenue. The choice is yours, but choose wisely. At the time of this writing, Google only allows you to track up to 4 total goals. I would choose those that have the biggest impact on the success of your business.
Unlike the first three components that are available to us in Google Analytics, the Goal Tracking component does not require any special code other than the “Basic” Analytic Tracking code that I showed you in the previous post. The thing is, as with most of the Google Analytics Tracking elements, this one relies on more than just “installation of tracking code” to get it working.
You can enhance Goal Tracking even further, to produce more powerful report data by creating what is called a “Funnel” to that Goal. By doing this, you will now be armed with the tools necessary to find out how effective the process leading up to an individual Goal really is. You will discover what flaws exist in the channel and where they are. In short, this will help you determine many things including, exactly at what point in your sales path users are abandoning the process. And as we all know, that is a critical element you need to know if you are to increase conversion.
The Introduction is Complete. Now On With the Show!
Ok, so I have introduced you to the 4 components that make up “Google Analytics”. The remaining parts of this series will go into more detail on each of the 4 pieces, explain how to set each up, give examples of such, and uncover how you can harness their collective power to help increase your conversion.
Until next time; keep the traffic flowing, and the analytics recording.
For more detailed information on how you can use Google Analytics to increase conversion of your website, be sure to check out Google Analytics Uncovered for Zen Cart: The Workbook..
Part 2 of this series discusses “Vanilla” Google Analytics including setup and troubleshooting for installation.
 First off, let me explain in short what Page Rank really is. “Page Rank” really is a measure of the incoming links to your website. Also understand that just “getting links” is not going to necessarily increase your Page Rank. The links must contain relevant content to what you offer in order to give you the most benefit. Naturally speaking then, it would make sense that the more relevant links you have coming to your website (from other similar sites), the higher your Page Rank will be.